“We see the same moon, you and I—you in your world and I in mine. I find that comforting.”
Its a nice, unattributable sentiment that has been the focus of movies, songs, and facebook posts the world over. On April 8, 2024, when a solar eclipse swept through the United States and my friends chased it across the country, I had my own brush with this age-old idea. Our experience wasn’t perfect; several people were battling clouds, and I didn’t make the journey to experience totality. Nevertheless, from Texas to New York, all of us gathered under the same moon and turned our eyes skyward.
My Eclipse Viewing
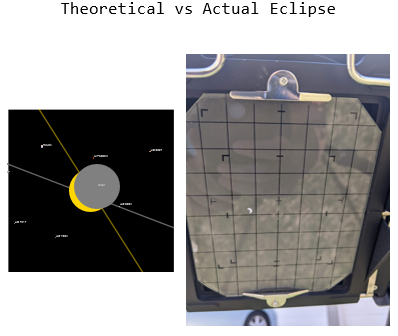
Of the four perspectives presented in this article, my personal eclipse viewing is the only one from outside the path of totality. Dropping a pin at my location:
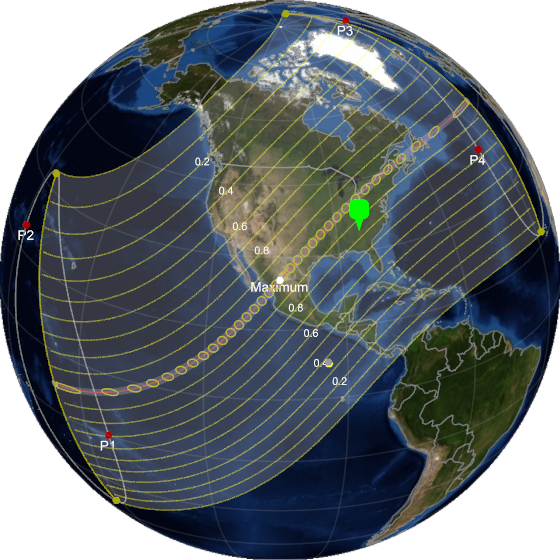
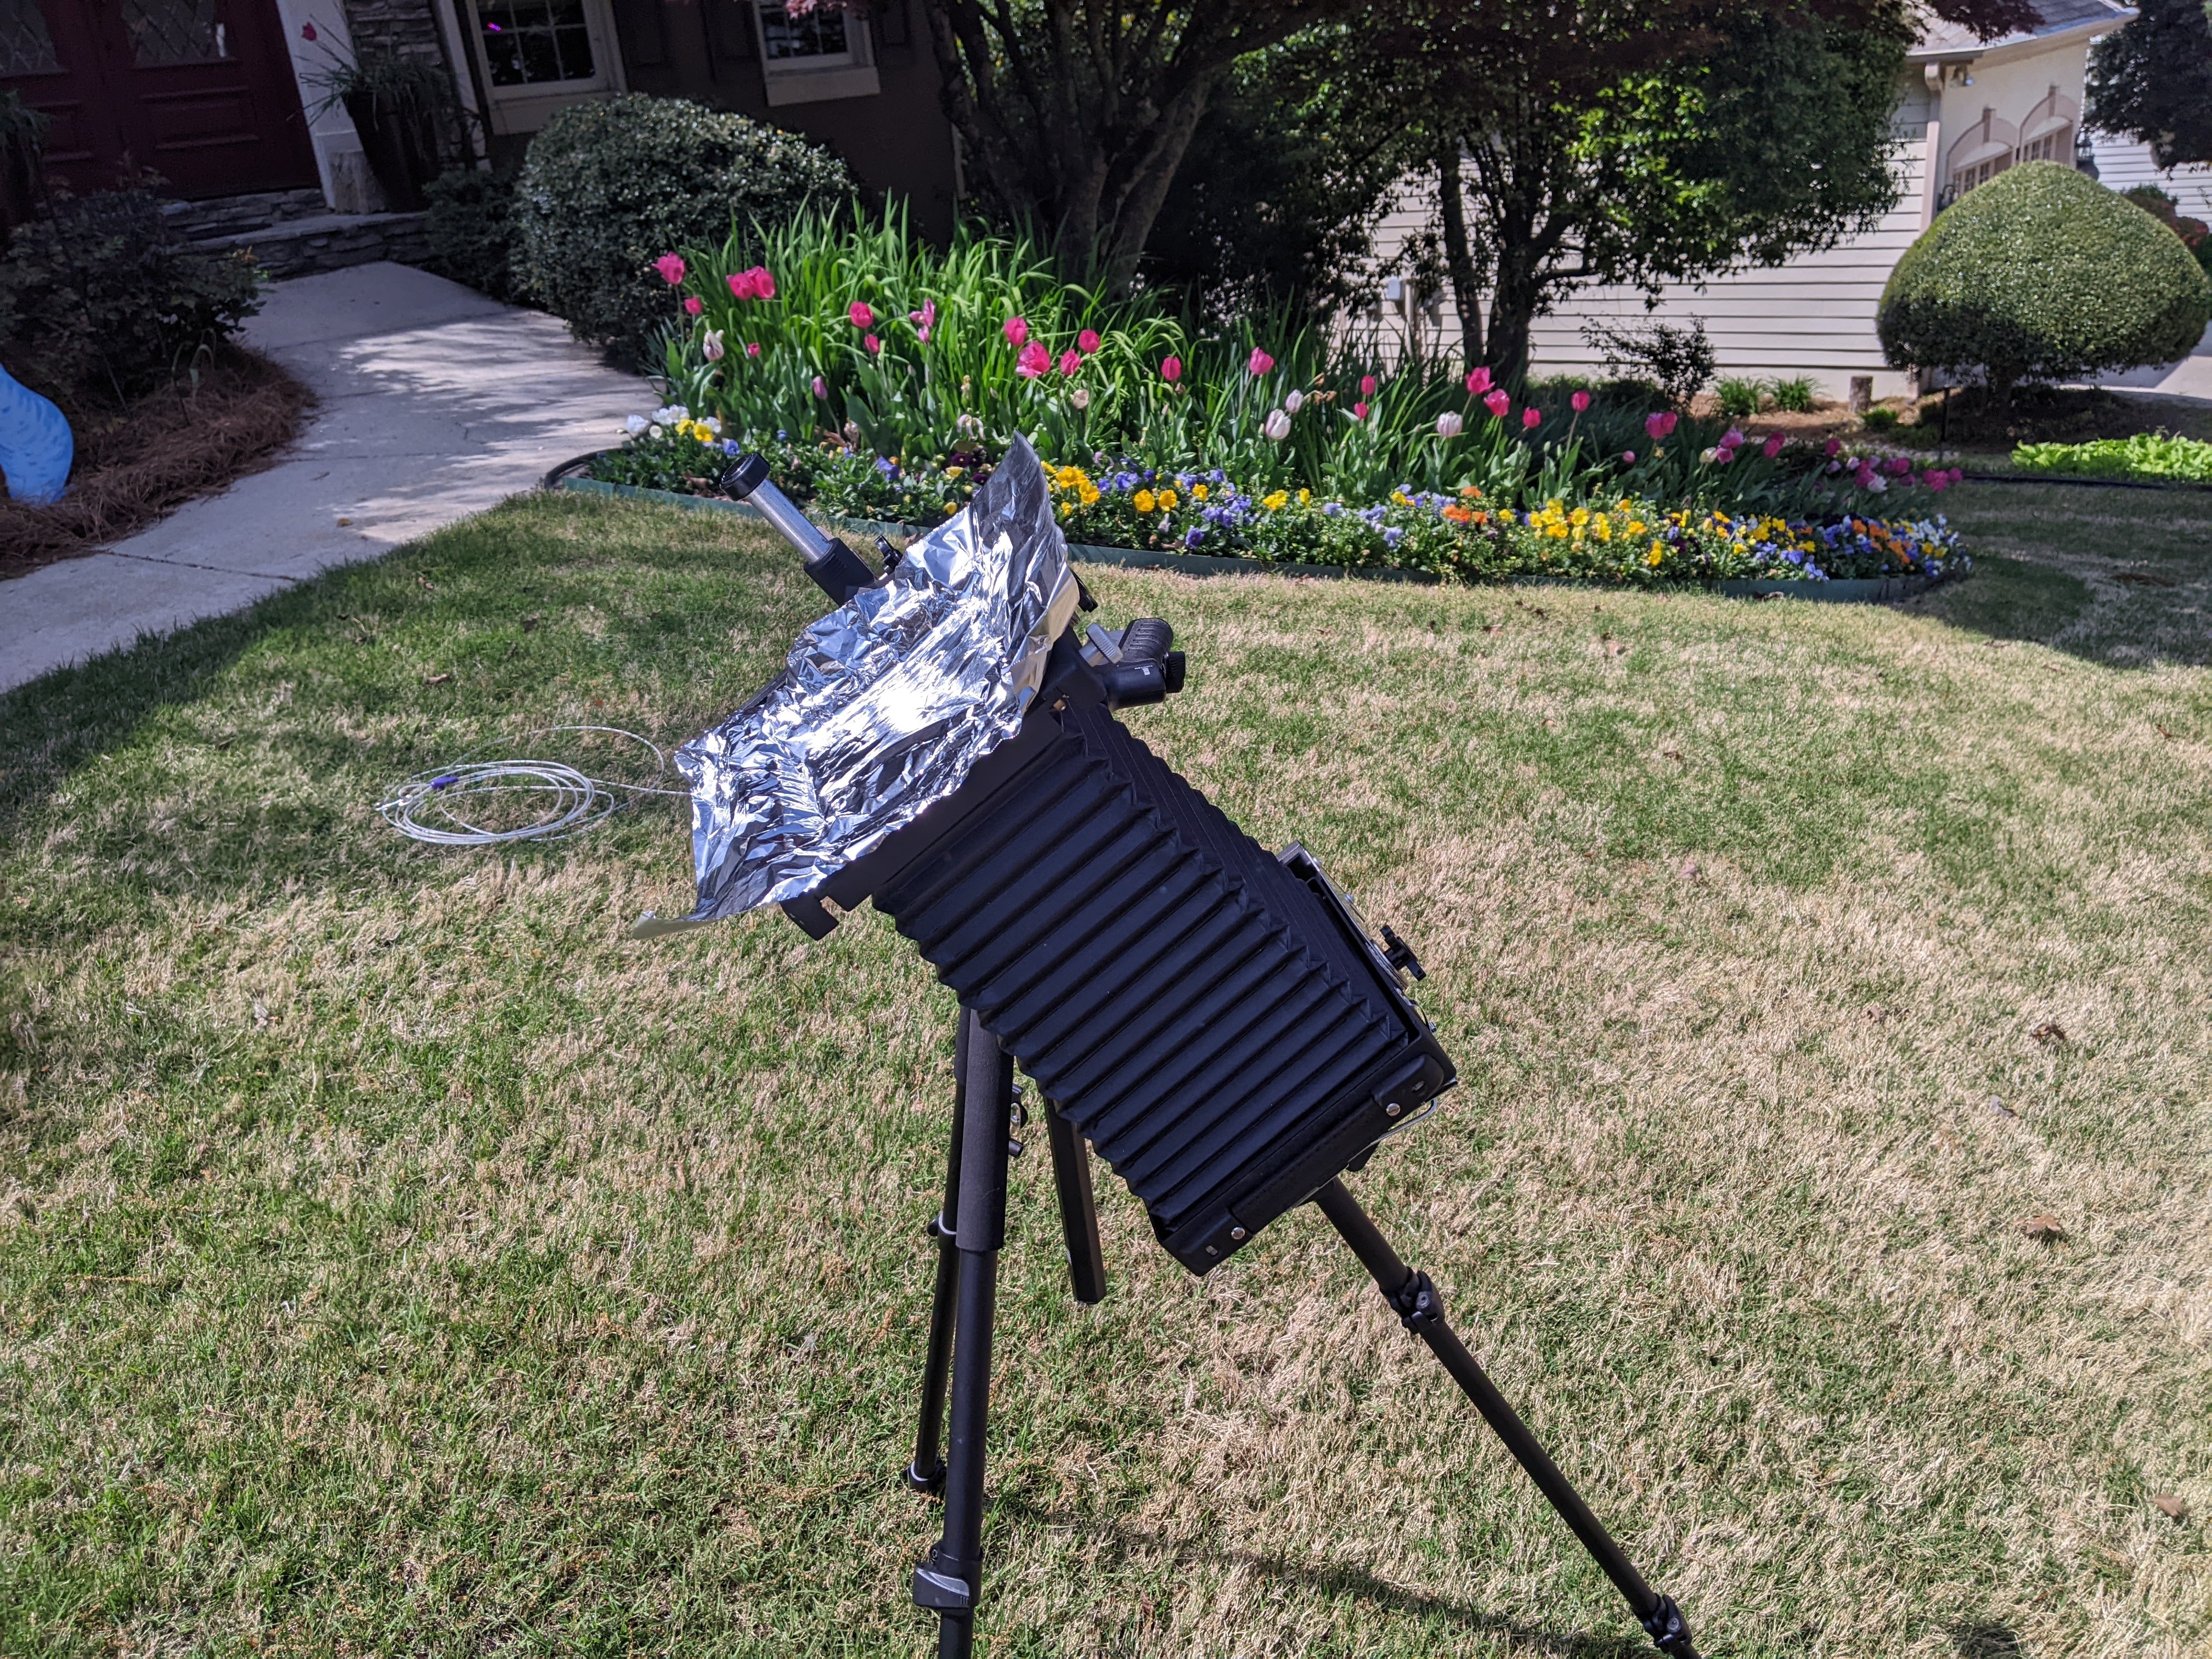
we can see that I only saw about 83% coverage from my viewing location outside of Atlanta, GA. According to NASA, the only time it is safe to view the eclipse without some kind of protection is during complete totality. My solution to this dilemma was a unique mix of basic and fancy: an old Calumet CC-400 view camera with a pinhole “lens” consisting of some aluminum foil punctured by a mechanical pencil (Note: This isn’t a tutorial or endorsement of this method! If you’re interested, instead follow instructions for constructing an “eclipse projector” from NASA or other reputable source.)
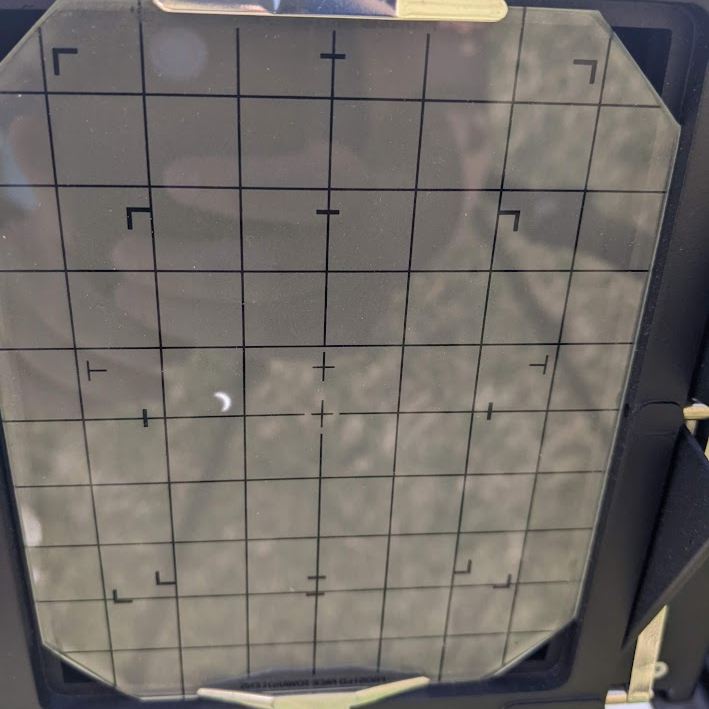
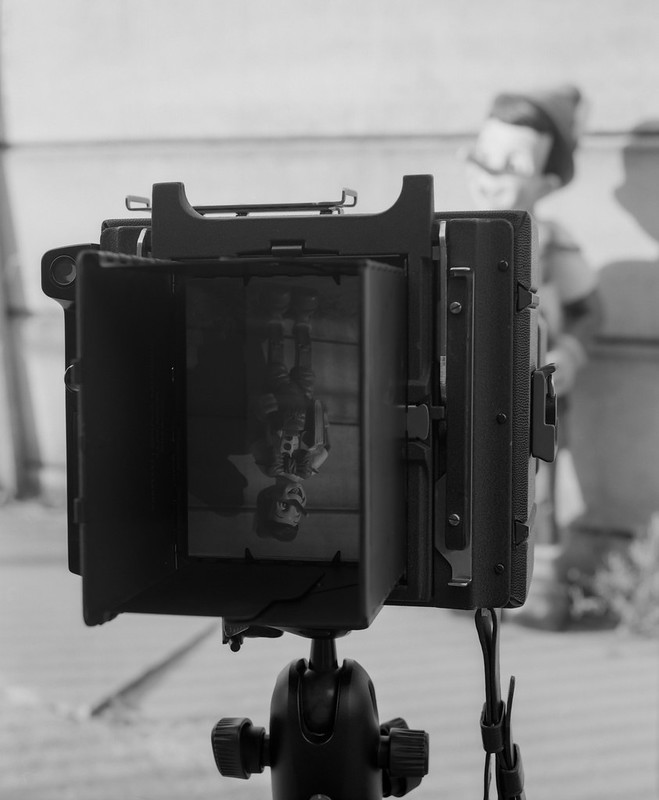
The camera itself (the accordion-like object in the above image) is essentially just empty space - a place to hold the lens on the front, a place to hold film on the back, and a light-tight tube connecting the two. When the film is removed, the lens instead projects an image on a piece of ground glass, allowing you to compose a photo (as long as you’re in a dark enough space, which is why old photographers are often seen huddling under a cloth hood). The resultant image on the ground glass is upside-down, something handheld cameras correct with a pentaprism, and mirrored, due to viewing the image “from behind” as it is projected on the ground glass. See the image below, taken by Cameron Shaw, as an example of these effects:
The result wasn’t the prettiest thing in the world, but it worked! At 3:10 pm, I snapped the photo of the eclipse shown to the right below. Unsurprisingly, it matches perfectly with Mathematica’s visualization for my time and location (shown on the left)! It is easy to see the mirroring I mentioned earlier, and if you look closely enough, you can make out the upside-down inversion as well.
My Friends’ Eclipses
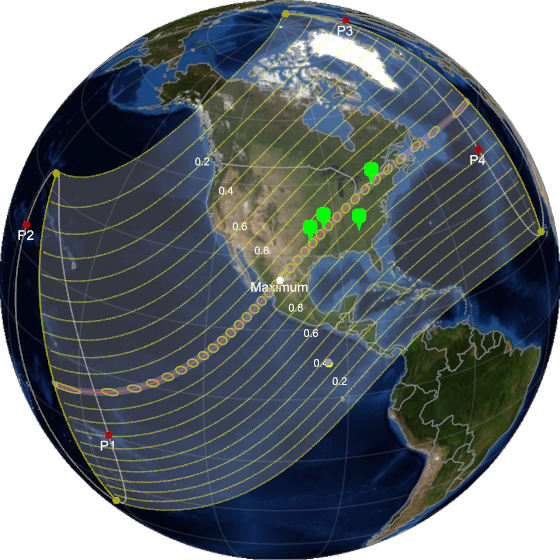
As I mentioned earlier, I had friends travel to Dallas, Texas; Rochester, New York; and Mt. Nebo, Arkansas to view the eclipse in totality. I’ve added pins for all four locations to the map below:
Rochester was cloudy, so the best my friend could send was a snapshot of the 360 degree sunset during totality. Nonetheless, its still cool to look at all four locations simultaneously to “watch” the eclipse transit the US! In the graphic below, the top row of animated images show the view of the eclipse across time from each of the four locations. Each frame of the graphic is synced in time - the only difference is the viewing location. The bottom row of images show a snapshot of the eclipse during maximum coverage, again from each of the four locations.
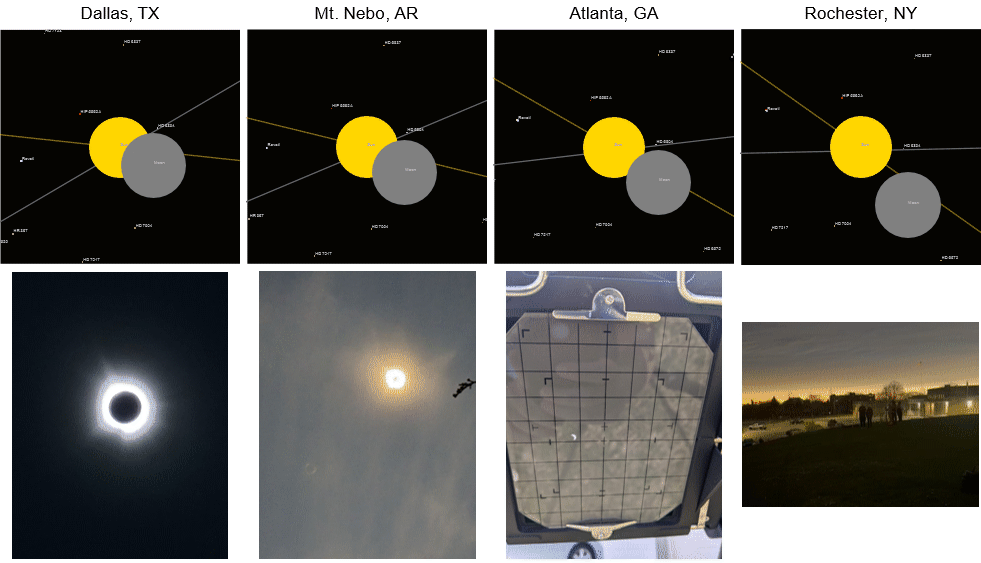
There are a couple interesting things to note about this graphic. One of these I already spoke about - my location in Atlanta didn’t get full coverage, a feature which is well represented in the animation. Otherwise, I think its fascinating to look at the relative timing of the eclipse at the different locations. Texas gets totality first, followed by Arkansas shortly after, I get my 83% brush in Atlanta, and, finally, my friend in New York is the last to observe totality.
Further Reading
The eclipse diagrams I used in this article (both the map and sun/moon visualizations) were produced in Mathematica. The creator this program, Stephen Wolfram, has written both a book and a detailed blog post about solar eclipses. Although I haven’t read his book, the aforementioned blog post served as inspiration for this article. If you’d like further details about different eclipse-related calculations you can do in Mathematica, it is definitely worth checking out!
Every time I pick up Mathematica, I’m constantly amazed at how much you can do with so little coding, and this project was no exception. If you want to check it out yourself, my notebook is available on GitHub. If you don’t have access to a copy of Mathematica, I’ve also saved a copy of my notebook as a pdf you can view anywhere. The presentation isn’t as polished as it is here, but its still a nice look at how everything was done.
Thanks for reading!